
Embarking on a new hatching season is always exciting, but before you place those precious quail eggs into the incubator, it’s crucial to ensure that the device is in optimal condition.
Conducting pre-season checks on your incubator is a vital step in ensuring the health and viability of your future chicks. This article will guide you through the essential aspects of preparing your incubator for the upcoming hatching season.
Importance of Pre-Season Incubator Checks
- Ensuring Viability: The health and viability of hatching eggs are significantly influenced by the conditions within the incubator.
- Preventing Loss: Early checks can prevent potential loss by identifying and rectifying issues before they can impact the hatching process.
- Optimizing Hatch Rates: Ensuring that all components of the incubator are functioning correctly can optimize hatch rates and produce healthy chicks.
Thorough Cleaning and Disinfection
- Remove Residue: Ensure that all remnants from previous hatches, such as shell fragments and fluff, are removed.
- Disinfect: Utilize a safe, non-toxic disinfectant to eliminate any bacteria or pathogens.
- Check for Mold: Inspect all corners and crevices for any signs of mold or mildew and clean accordingly.
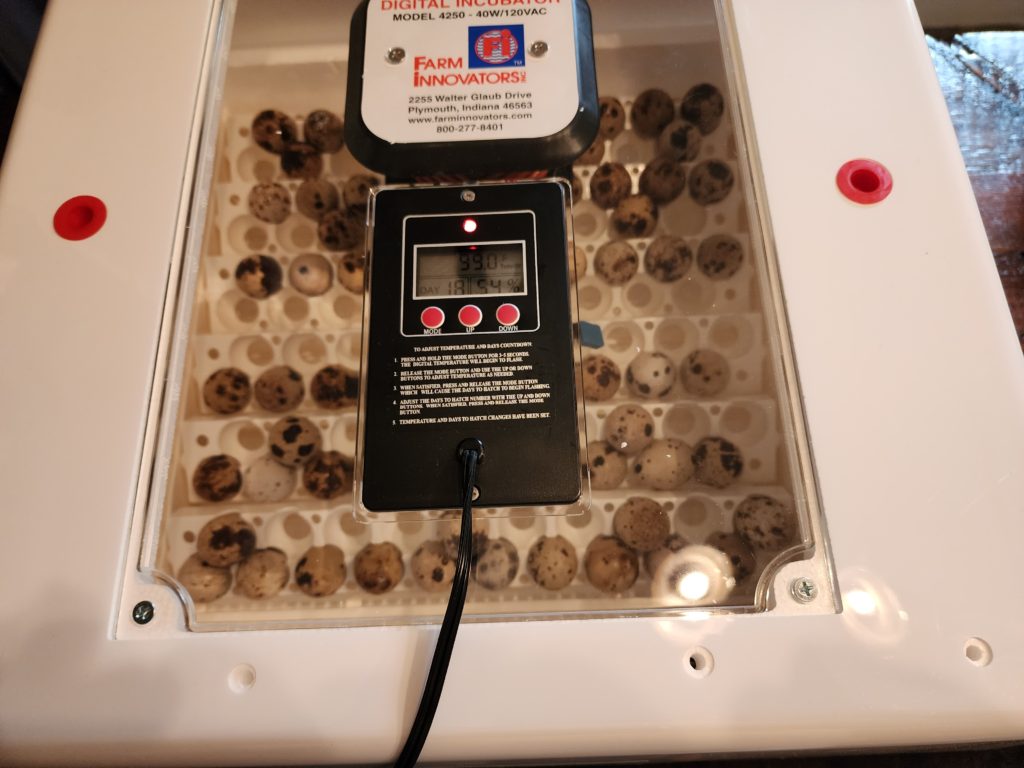
Incubator Temperature and Humidity Calibration
- Verify Accuracy: Use a calibrated Incubator thermometer and hygrometer to verify the accuracy of the incubator’s built-in systems.
- Stability: Ensure that the incubator can maintain stable temperature and humidity levels over several days.
- Adjust and Test: Make necessary adjustments and test under different ambient conditions to ensure stability under various scenarios.
Inspecting the Fan and Air Vents
- Fan Functionality: Ensure that the fan is functioning correctly and is able to circulate air efficiently.
- Ventilation: Check that air vents are unobstructed and can facilitate adequate air exchange.
- Dust and Debris: Clear any dust or debris from the fan and ventilation system to prevent respiratory issues in developing embryos.
Examining Incubator Egg Turners
- Smooth Operation: Ensure that the egg turner operates smoothly and consistently.
- Correct Angle: Verify that eggs are being turned to the correct angle to prevent the embryo from sticking to the shell.
- Manual Turning: If the turner is malfunctioning, be prepared to turn the eggs manually and ensure you are available to do so multiple times a day.
Checking the Incubator’s Seals
- Seal Integrity: Ensure that the incubator’s seals are intact to prevent heat and humidity from escaping.
- Door Alignment: Check that the door is aligned and seals correctly when closed.
- Replace if Necessary: If seals are worn or damaged, replace them to maintain the internal environment’s stability.
Testing the Alarm System
- Functionality: Test the incubator’s alarm system to ensure it alerts you to any deviations in temperature or humidity.
- Visibility and Audibility: Ensure that alarms are both visible and audible to prompt timely intervention.
- Battery Check: If your alarm system is battery-operated, ensure they are fresh or adequately charged.
Reviewing the Power Supply
- Stable Power: Ensure that the power supply to the incubator is stable and consistent.
- Backup Plan: Have a contingency plan, such as a generator or backup incubator, in case of power failure.
- Power Cords: Check the condition of power cords and replace them if they show any signs of wear or damage.
Running a Test Hatch
- Simulate Conditions: Run a test hatch with a few eggs to simulate actual hatching conditions.
- Identify Issues: A test run can help identify any issues that might not be apparent during initial checks.
- Record Observations: Keep a log of temperature, humidity, and any issues during the test hatch to make necessary adjustments.
Conclusion
Conducting a thorough pre-season check of your incubator is paramount in ensuring a successful and efficient hatching season. By meticulously examining each component and running a test hatch, you can identify and rectify potential issues, thereby safeguarding the health and viability of your future quail chicks. Always remember, a well-maintained incubator is the first step towards a successful hatching season.