
Incubating Quail Eggs can be an exciting activity, but care is needed to ensure the best hatch rates. Follow our instructions below for the best hatch rates:
- Equipment Needed for Incubating Quail Eggs
Incubator with Hydrometer, egg rails sized for quail eggs, and an automatic egg turner
- Source Your Hatching Eggs
Source your quail hatching eggs locally or order quail hatching eggs online from Sandy Soil Farms. We recommend SSF Jumbo Coturnix Quail Hatching Eggs to provide the largest quail with the largest eggs
- Collect Your Own Hatching Eggs
If you will be incubating quail eggs collected from your flock, store the eggs between 65-70 degrees with the pointy end facing downward.
If you will be storing the eggs for multiple days, turn the eggs at least once per day for better hatch rates - Prevent Splayed Legs
Consider using sandpaper or gravel paper on the hatching floor to prevent you quail chicks from getting splayed legs.
Splayed legs are a common issue when hatching quail, but can be prevented. This is caused by young chicks dislocating their hips on a slippery surface shortly after hatching - Inspect Your Hatching Eggs
Inspect all quail eggs to hatch for shell damage or cracks, prior to placing your egg in the incubator. Do not incubate damaged eggs as the eggs will break open and expose bacteria to your chicks.
*Wash hands prior to handling egg to prevent contamination - Acclimate Your Shipped Hatching Eggs
Resist the urge to put your hatching eggs directly in the incubator when you receive them. Open the box and place your eggs pointy end down at room temperature for 24 hours, prior to incubating quail eggs.
You will have better hatch rates if you allow the eggs to rest after the jostling during shipment and acclimate to room temperature - Set Up Your Incubator
Turn your incubator on and provide ample time for your incubator to get up to temperature and stabilize the humidity before starting the incubation of your quail eggs.
Make small adjustments to temperature and humidity until the incubator has stabilized at 99.5 degrees and 45 % Relative Humidity. *Note that acceptable temperature is plus or minus 1 degree, acceptable range for Relative Humidity is 40%-50% when incubating quail eggs - Set Your Hatching Eggs
Place eggs in the incubator (pointy end down) and ensure that your automatic egg turner will turn the eggs a minimum of 3 times per day.
Be sure to mark your calendar with the start date, 15 days from the start date (Lockdown Day), and 18 days from the start date (Hatch Date) - 14 Day Incubation Period
Let your incubator do the hard work for 14 days, while checking your incubator multiple times daily.
Ensure that the incubator is maintaining 99.5 degrees (plus or minus 1 degree) and 45% Relative Humidity (plus or minus 5%).
*It is best to NOT open your incubator while incubating quail eggs. If you must open the incubator, do so quickly and ensure that the temperature and humidity stabilize as quickly as possible - Candle Your Quail Eggs
If you intend to candle your eggs, shine an egg candler or bright flashlight through the back side of the egg towards you so that you can see inside the egg. You are looking for life signs such as formed blood vessels, a dark mass in the wider portion of the egg, and a perfectly formed air sac in the pointy end of the egg.
*Quail eggs can be difficult to candle, however it can be done with a significantly bright egg candler or flashlight. Candling can be a very fun and informative process, especially for children.
However, remember that every time you open your incubator, you are disrupting the temperature and humidity needed for the eggs to properly incubate. We recommend not candling your quail hatching eggs to ensure the best possible hatch rate. - Lockdown Your Incubator on Day 15
On day 15 of incubation, move your eggs from the incubation racks/rails to the hatch floor, stop turning the eggs, and increase the humidity. You are now entering the hatching period and must increase the relative humidity to 60% Relative Humidity (plus or minus 5% RH).
*If you are having trouble stabilizing the humidity, lower humidity is better for quail than being too high. Any water droplets inside your incubator are a sign that your humidity is too high - Watch Your Quail Chicks Hatch!
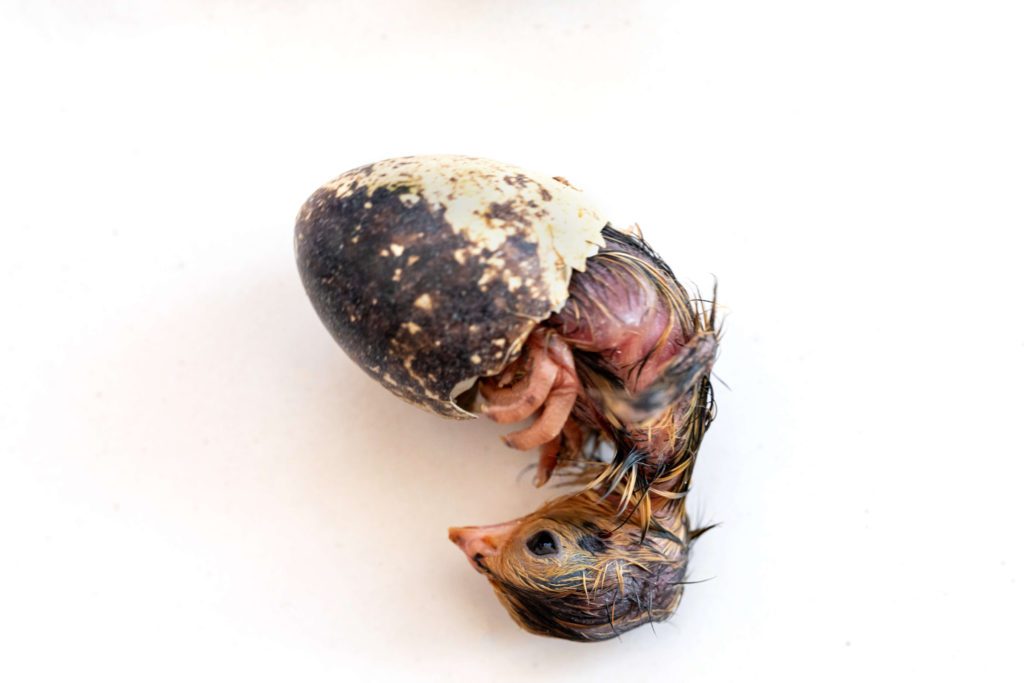
17-18 days is the typical hatching period for quail, however you may have quail hatch early or late. Keep an ear out for peeping noises coming from your incubator.
Do not remove quail chicks immediately, wait 12-24 hours from the first hatchlings to remove a batch of chicks from the incubator.
Your goal here is to open the incubator as little as possible and remove the quail chicks in batches.
*Dropping the humidity too much while incubating quail eggs will cause the shell linings to shrink up and trap the quail chicks inside the egg - Remove Quail Chicks from Incubator
Move Quail Chicks to Brooder. Move your quail chicks from the incubator in batches. Place them directly in your brooder with fresh water, chicks starter feed, and adequate heat